

Once we were moved in and settled enough, I started dreaming of having chickens for meat and eggs. I researched my little heart out to find out how much room each chicken would need in the coop and the pen. The nesting boxes where the hens would lay their eggs needed to be just the right size to be desirable to the hens. Happy hens equal lots of farm fresh eggs!
I purchased a few books for reference. I find the books “for dummies” to be some of the best books when there’s a subject you have absolutely no knowledge about. I purchased the book “Raising Chickens for Dummies” which is written by a chicken expert (Kimberley Willis) and the owner and manager of BackYardChickens.com (Robert T. Ludlow). This website is one of the best on the internet regarding chickens and more. It is chock full of information, chats, and forums on the subject of chickens, turkeys and other birds. It is interesting to read about others’ experiences. Their trials and errors will save me the time of making the same mistakes. The book “Storey’s Guide to Raising Turkeys” by Don Schrider was also a great reference on the subject of turkeys.
I read about all kinds of coops, some were very complicated, some more simple. I spotted a coop on wayfair.com that was a type of chicken “tractor” as I had read about. It was a coop with wheels on the back making it moveable. Since chickens eat every trace of weeds and seeds, bugs, bug eggs and anything else edible, a chicken tractor moved every few days would beautifully groom a lawn or field. I read about some folks who used the chicken tractor to naturally prepare a whole field for putting livestock in. The chickens effectively remove weeds and their seeds which leaves lush, edible grass to grow. Here’s a picture of the Wayfair ‘tractor’ coop:
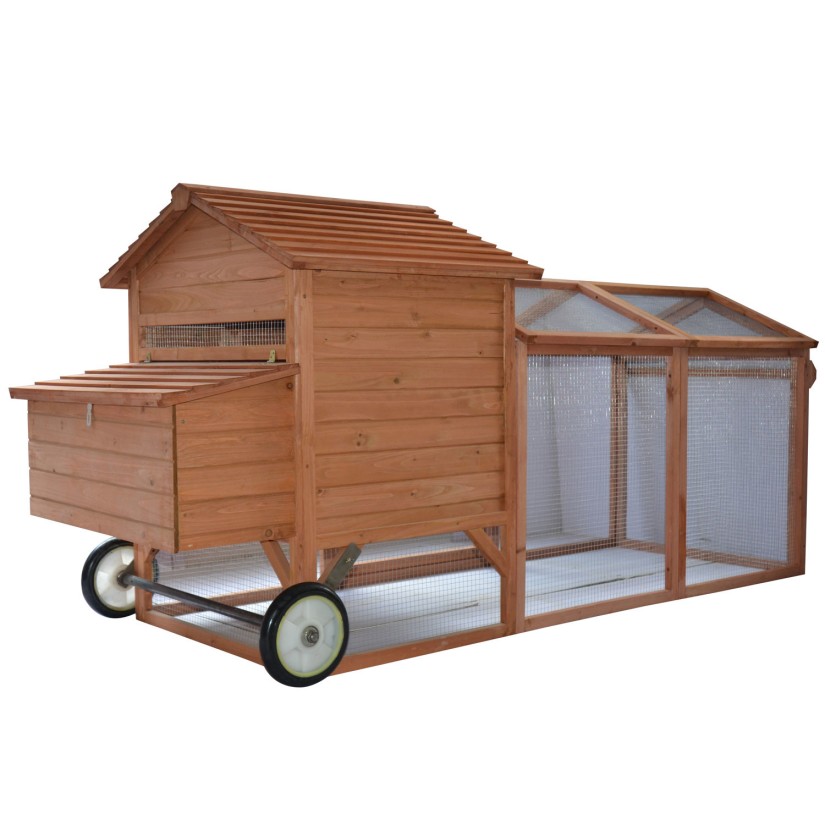
I make a habit of reading reviews on any product online. Selling for $340 plus shipping, this coop had several so-so reviews. The overall rating was 3 out of 5 stars. Most said the assembly instructions were out of focus and hard to follow. The reviews that interested me said the wood is very flimsy and the whole thing bends and flexes when lifted and moved. I wanted a coop that would last through many, many cold Minnesota winters and couldn’t be chewed through by some overzealous mink or raccoon. The covered pen will keep predators like owls or hawks from striking from above. We can only hope the Fisher doesn’t come back for revenge. I wrote about it in my post titled “All Creatures Great and Small”.
I found a design on BackYardChickens.com which was the same design as the Wayfair coop plus it showed the different stages of construction.
http://www.backyardchickens.com/a/chills-chicken-coop
I had already planned to build my own coop and after reading about a lot of different designs I decided to combine them into one perfect coop!! I designed a coop to house about 15 birds. It is recommended that each adult chicken have 2-3 feet of floor space in the shelter and 3-6 feet of floor space in the outdoor run. I wanted it to be movable and wanted access to the nesting box and inside of the coop from the outside of the run area. This way I didn’t have to enter the run to access eggs or to clean out the coop.
I learned what little I know about building things from my dad, George, who is no longer with us. He and I completed little projects like a rabbit hutch, shelving, and a sand box with a cover. So with a little know-how and a rough sketch of my idea, I set off to build the coop.
In order to withstand the seasons year after year and be durable enough to be moved around I decided which materials to use:
I used a little less than four 2″x 6″x 12 foot boards for the long boards of the base and three braces in the front, middle add rear of the base
2″x 4″s for the main framing of the coop
2″x 2″s for the outdoor run framing
chicken wire to cover the outdoor pen and the vents in the coop
1/2″ plywood for the walls and roof
3/4″ plywood for the floor of coop
asphalt roofing shingles for the roof with tar paper underneath
wood screws, different lengths
staples
roofing nails
Hardware: Different sizes of hinges,”L” brackets, latches, and a small pulley and rope
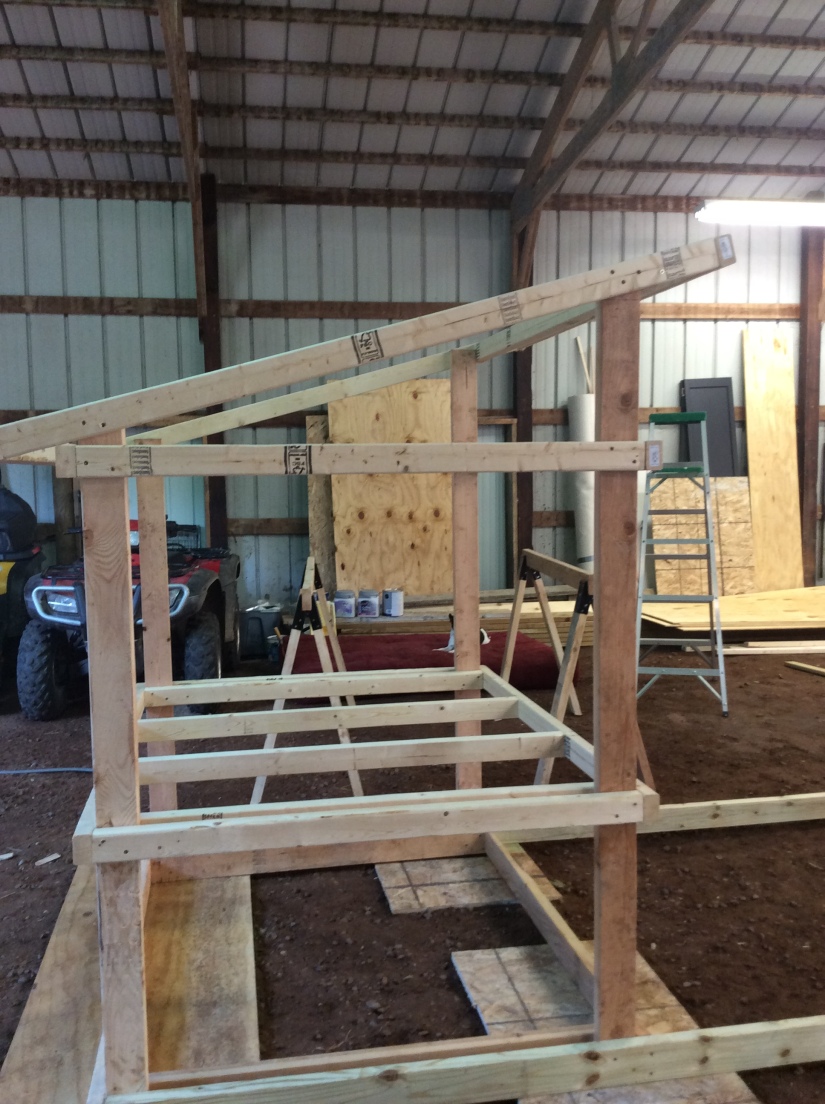
To begin, I layed some scrap pieces of plywood on the barn floor to build on in order keep the structure as level as possible.
Next, I built the basic frame on the floor, 12 feet long by 5 feet wide, and screwed it together using long wood screws and a rechargeable drill. The star or square bit screw heads work better than the standard Phillips because they don’t strip as easily. I used lots and lots and lots of screws.
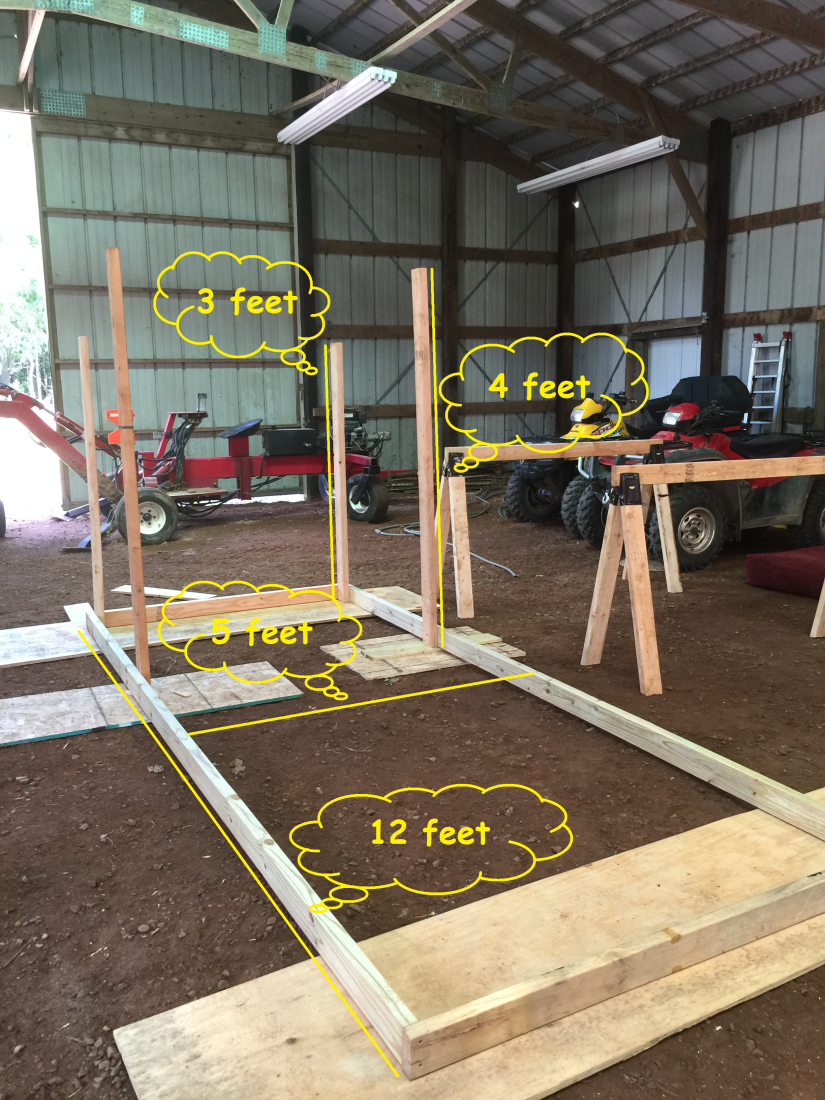
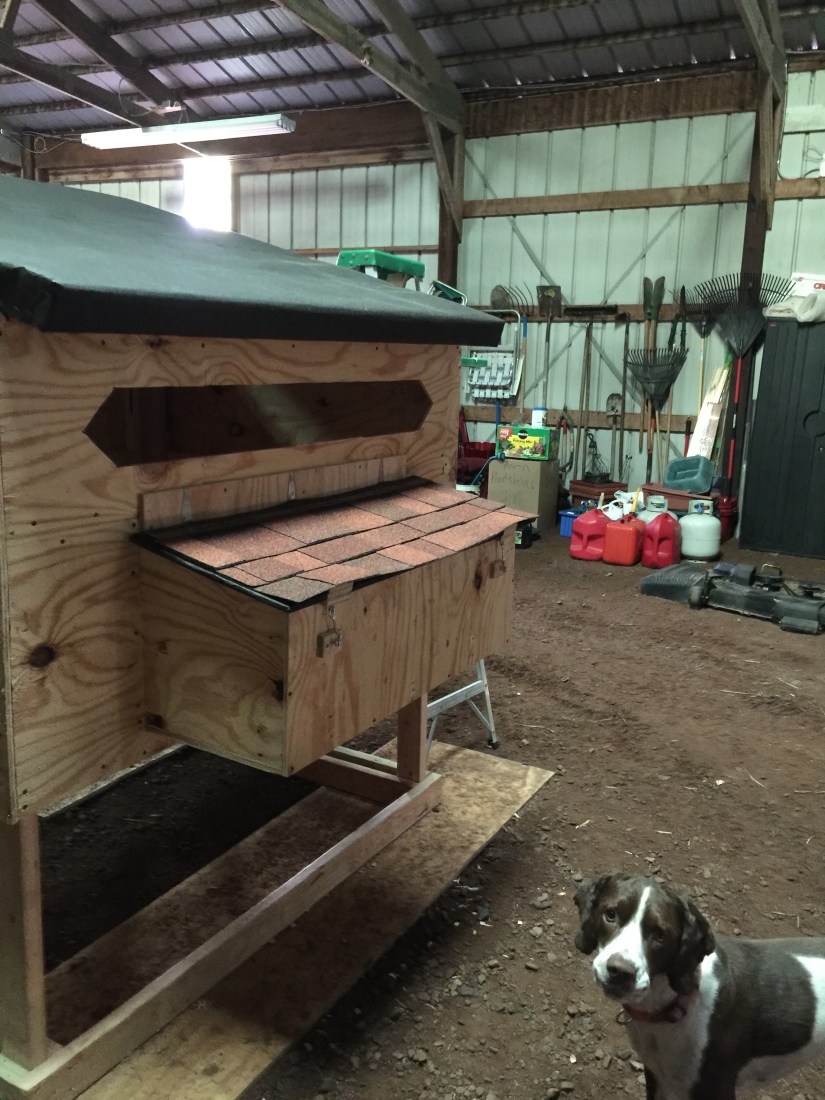
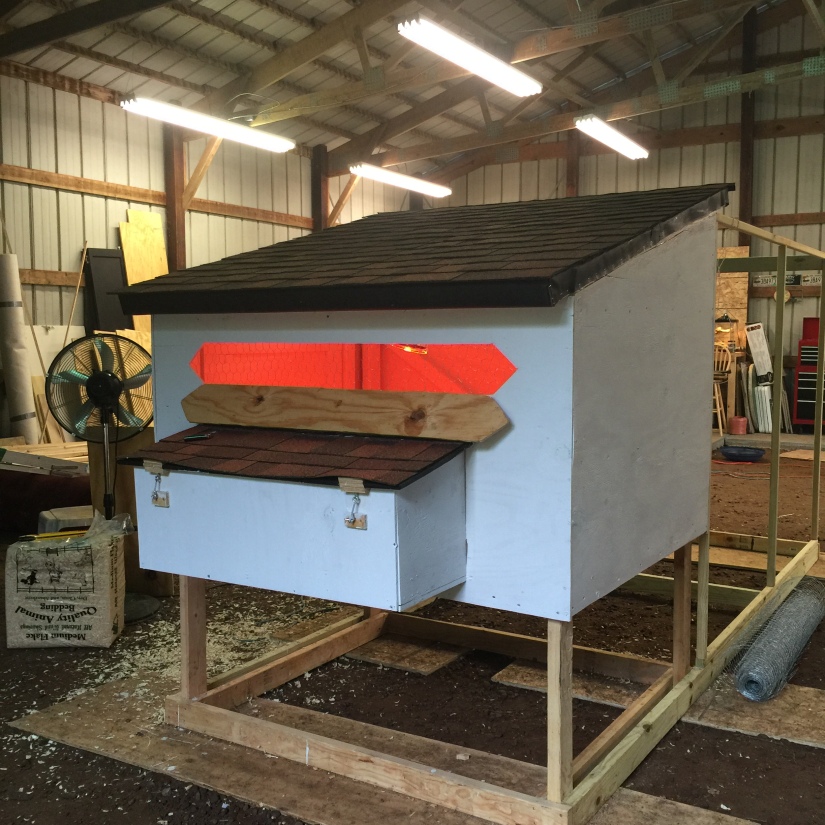
I wanted the roof to have a slant for the rain to run off so I made it 4 feet high in the front and 3 feet in the back giving it a nice slope.
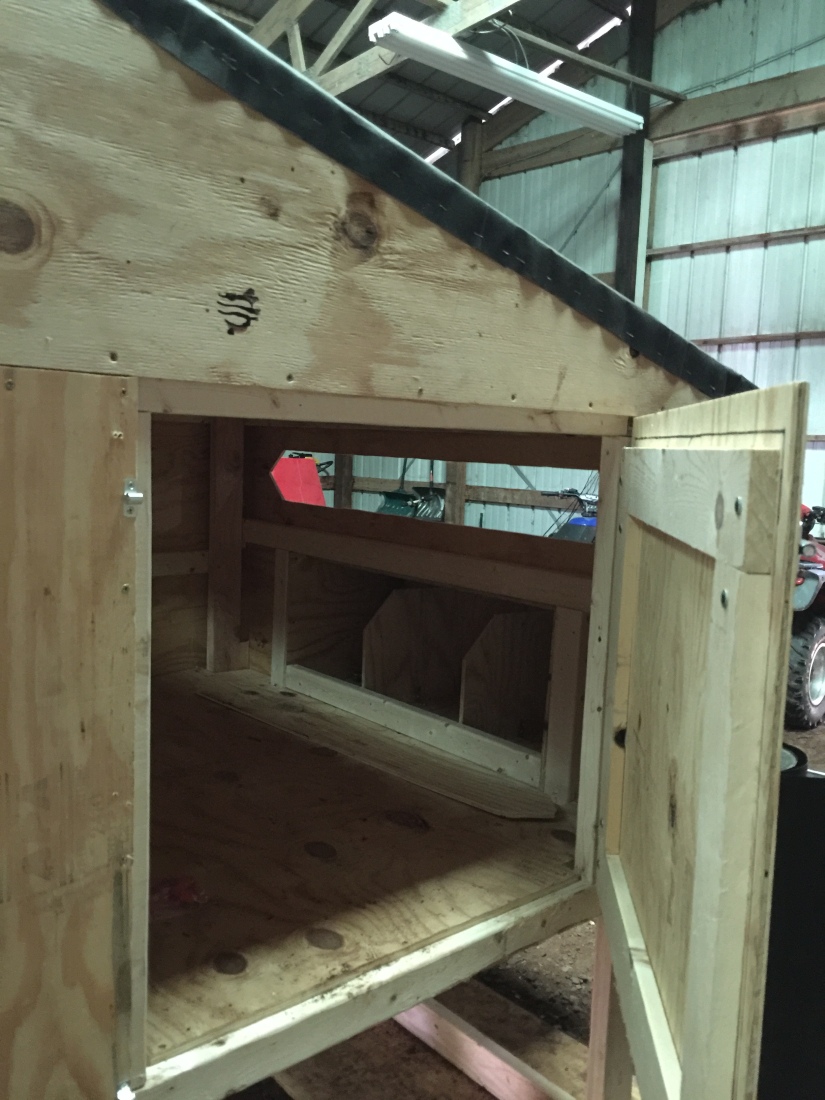
Next step was to frame the coop making sure it was tight and sturdy with plenty of boards to secure the walls, floor, and roof to. In my plan I had already decided where extra framing would be needed around the chicken door, the large coop access door, and the nesting box.
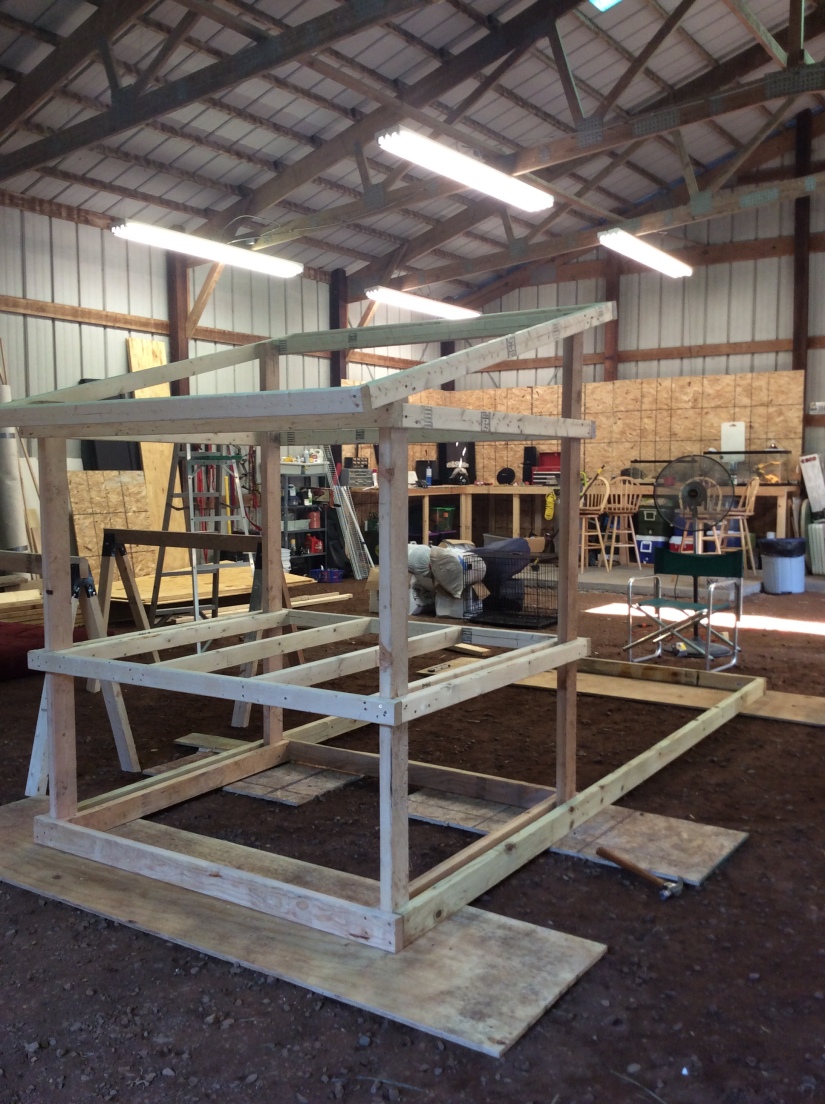
I cut a piece of plywood to cover the coop floor then did the same for the roof and walls, cutting holes for the coop access door, the chicken door, the nesting boxes, and a vent in front and one in back. I saved the cutouts from the vents and later hinged them back in place so they could be opened and closed.
The nesting box has a slanted roof like the coop to let the rain run off. The box is a 3 foot by 1 foot bump-out on the back of the coop. I added it using “L” brackets and lot and lots of screws. There are three sections, inside the nesting box to give the hens a little privacy. I also added these privacy walls using “L” brackets.
I researched framing, building doors, installing latches, hinges, tar paper, shingles, and anything else I didn’t know how to do, online. I looked at hundreds of different coops and used other people’s ideas and designs to help me throughout this building process.
The nesting box was tricky but with some different sized “L” brackets, it was a success!
Chills coop plan had a chicken door that could be opened and closed from the outside of the pen with a string and pulley.
I cut a piece of shelving bracket in half and used the pieces as channels for the door to smoothly ride up and down. With a small pulley and a good length of thin rope, it was a success! Now the coop could be closed at night and opened in the morning as needed from the outside.
Next, the ramp was added. Thin strips of plywood were added across the ramp at regular intervals to help the small chicks up the ramp.


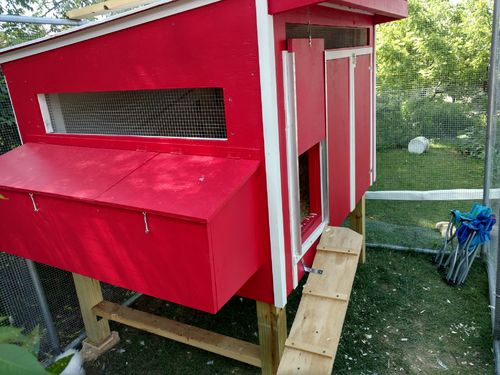
I put a light inside the coop in one evening so I could see all of my errors: gaps and cracks. Where I saw light, I filled with outdoor grade silicon caulk and let it dry. Next, the whole inside and out was painted white. I used 3 coats of paint to make sure it was sealed and the wood was protected. The painting was all done by friends, Aleigha and Pia. 🙂
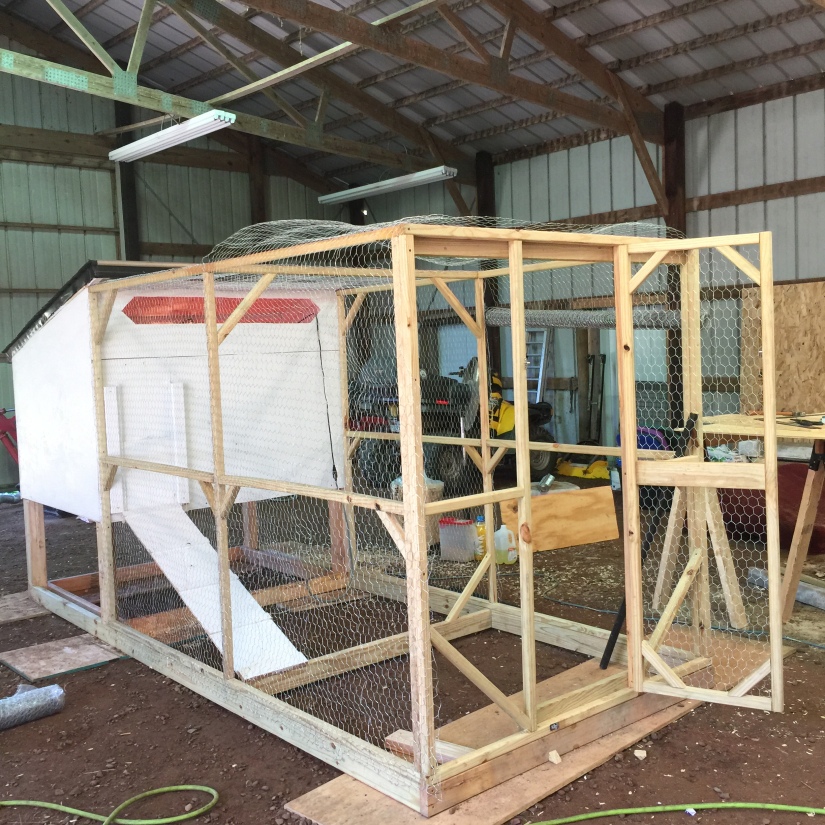
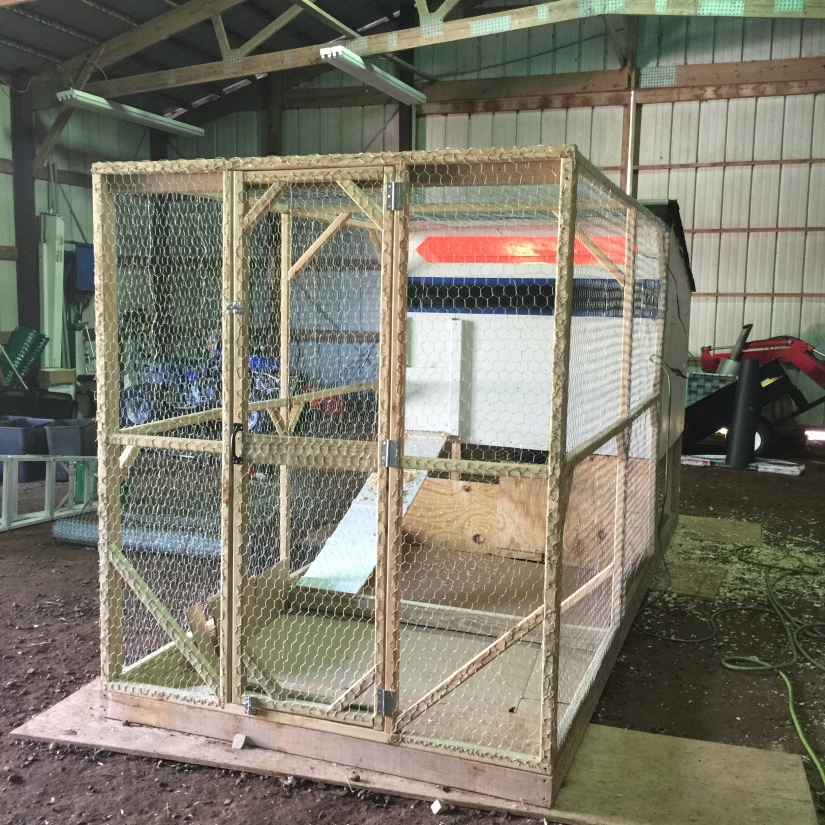
Now the framing was added to the pen area.
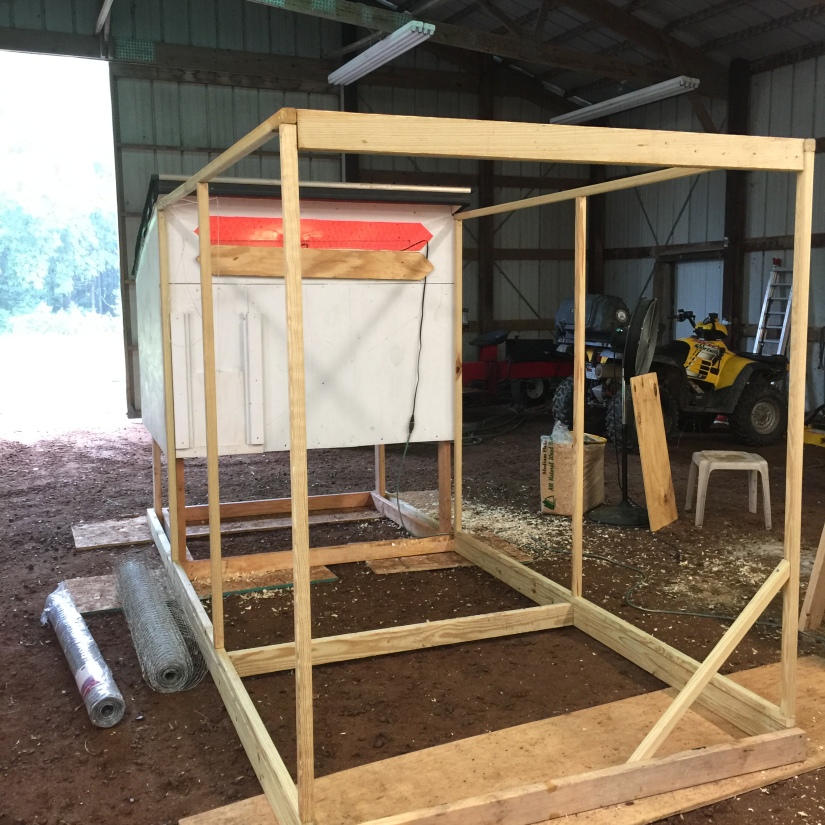
I kept adding more 2 x 2’s to make it solid. I added a simple door, then covered the whole thing with chicken wire. After having the chicks a while, the dogs’ scratching began to bend the wire around the whole bottom half so I added another layer of chicken wire. I can’t begin to guess how many staples are on this! I used an air compressor and staple gun which made this a LOT easier than a hand or electric stapler, and it was more FUN!!
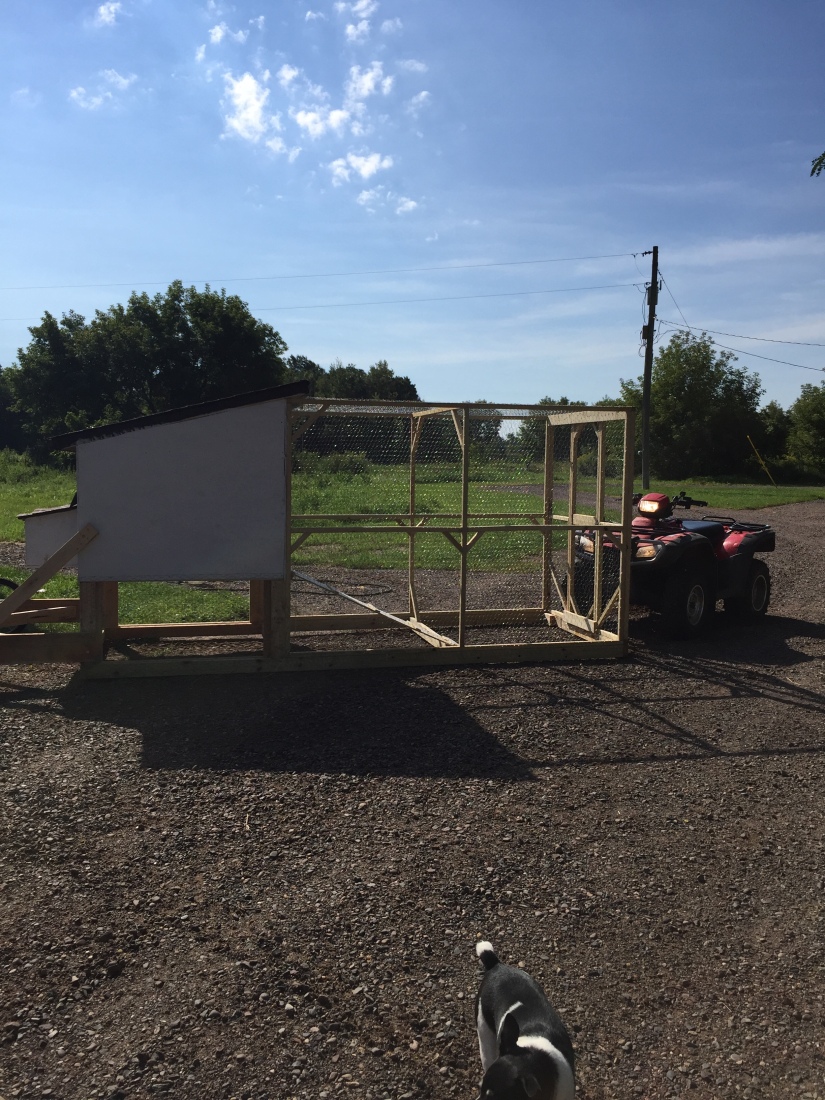
In order to turn the chicken coop into a chicken ‘tractor’ my husband, Keith, and I figured out how to construct an extension off the back of the coop where wheels could be attached to either side. We added 20-inch wheels to an extension so the axle of each wheel was 30 inches behind the coop.
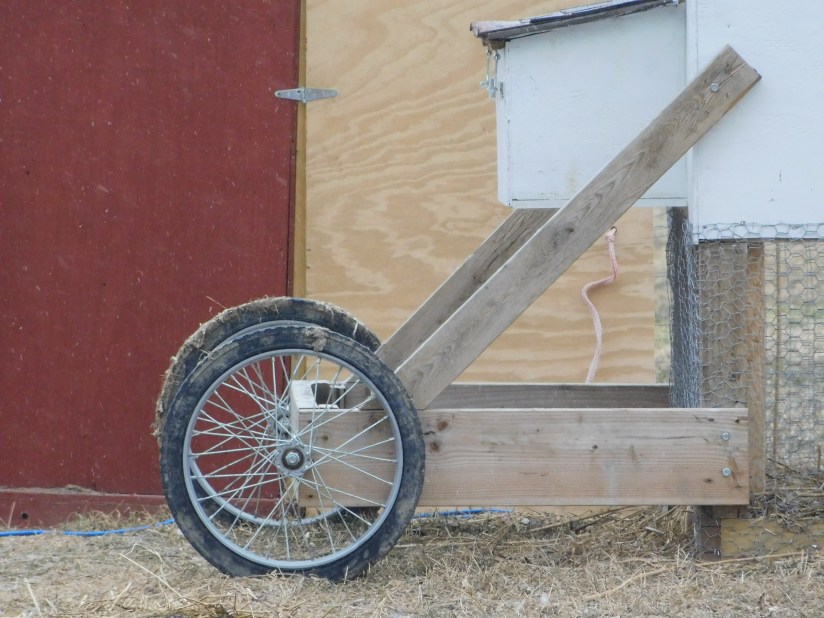
I used large bolts to attach the extension to the coop structure. On the other end of the pen, I drilled holes for two large eye bolts through the 2 x 6’s on the bottom frame and attached with nuts as tight as possible. I then attached a length of large chain between the two eye bolts. The hook from the winch on my atv hooked up to the chain. When the winch was reeled in, the front of the chicken coop raises and engages the wheels so it can be moved. It needs a bit of tweaking as uneven ground can prove very difficult to maneuver with the tractor but it works!!
Building our coop was one of the funnest projects ever and it did take a lot of work in the very hottest, most humid part of the summer, but it was all worth it. We now have healthy, happens chickens that are surviving the winter.They bless us with their eggs every day!
Our thanks to all the help we got on the coop: Paul, Aleigha, Pia, Andrew
Next I’ll tell you about our chickens…
